Set Your Box Size
When you open a box style, you see its dieline: the flat drawing of your box, with lines for cutting and folding. You type your sizes on the left, and the dieline updates on the right.
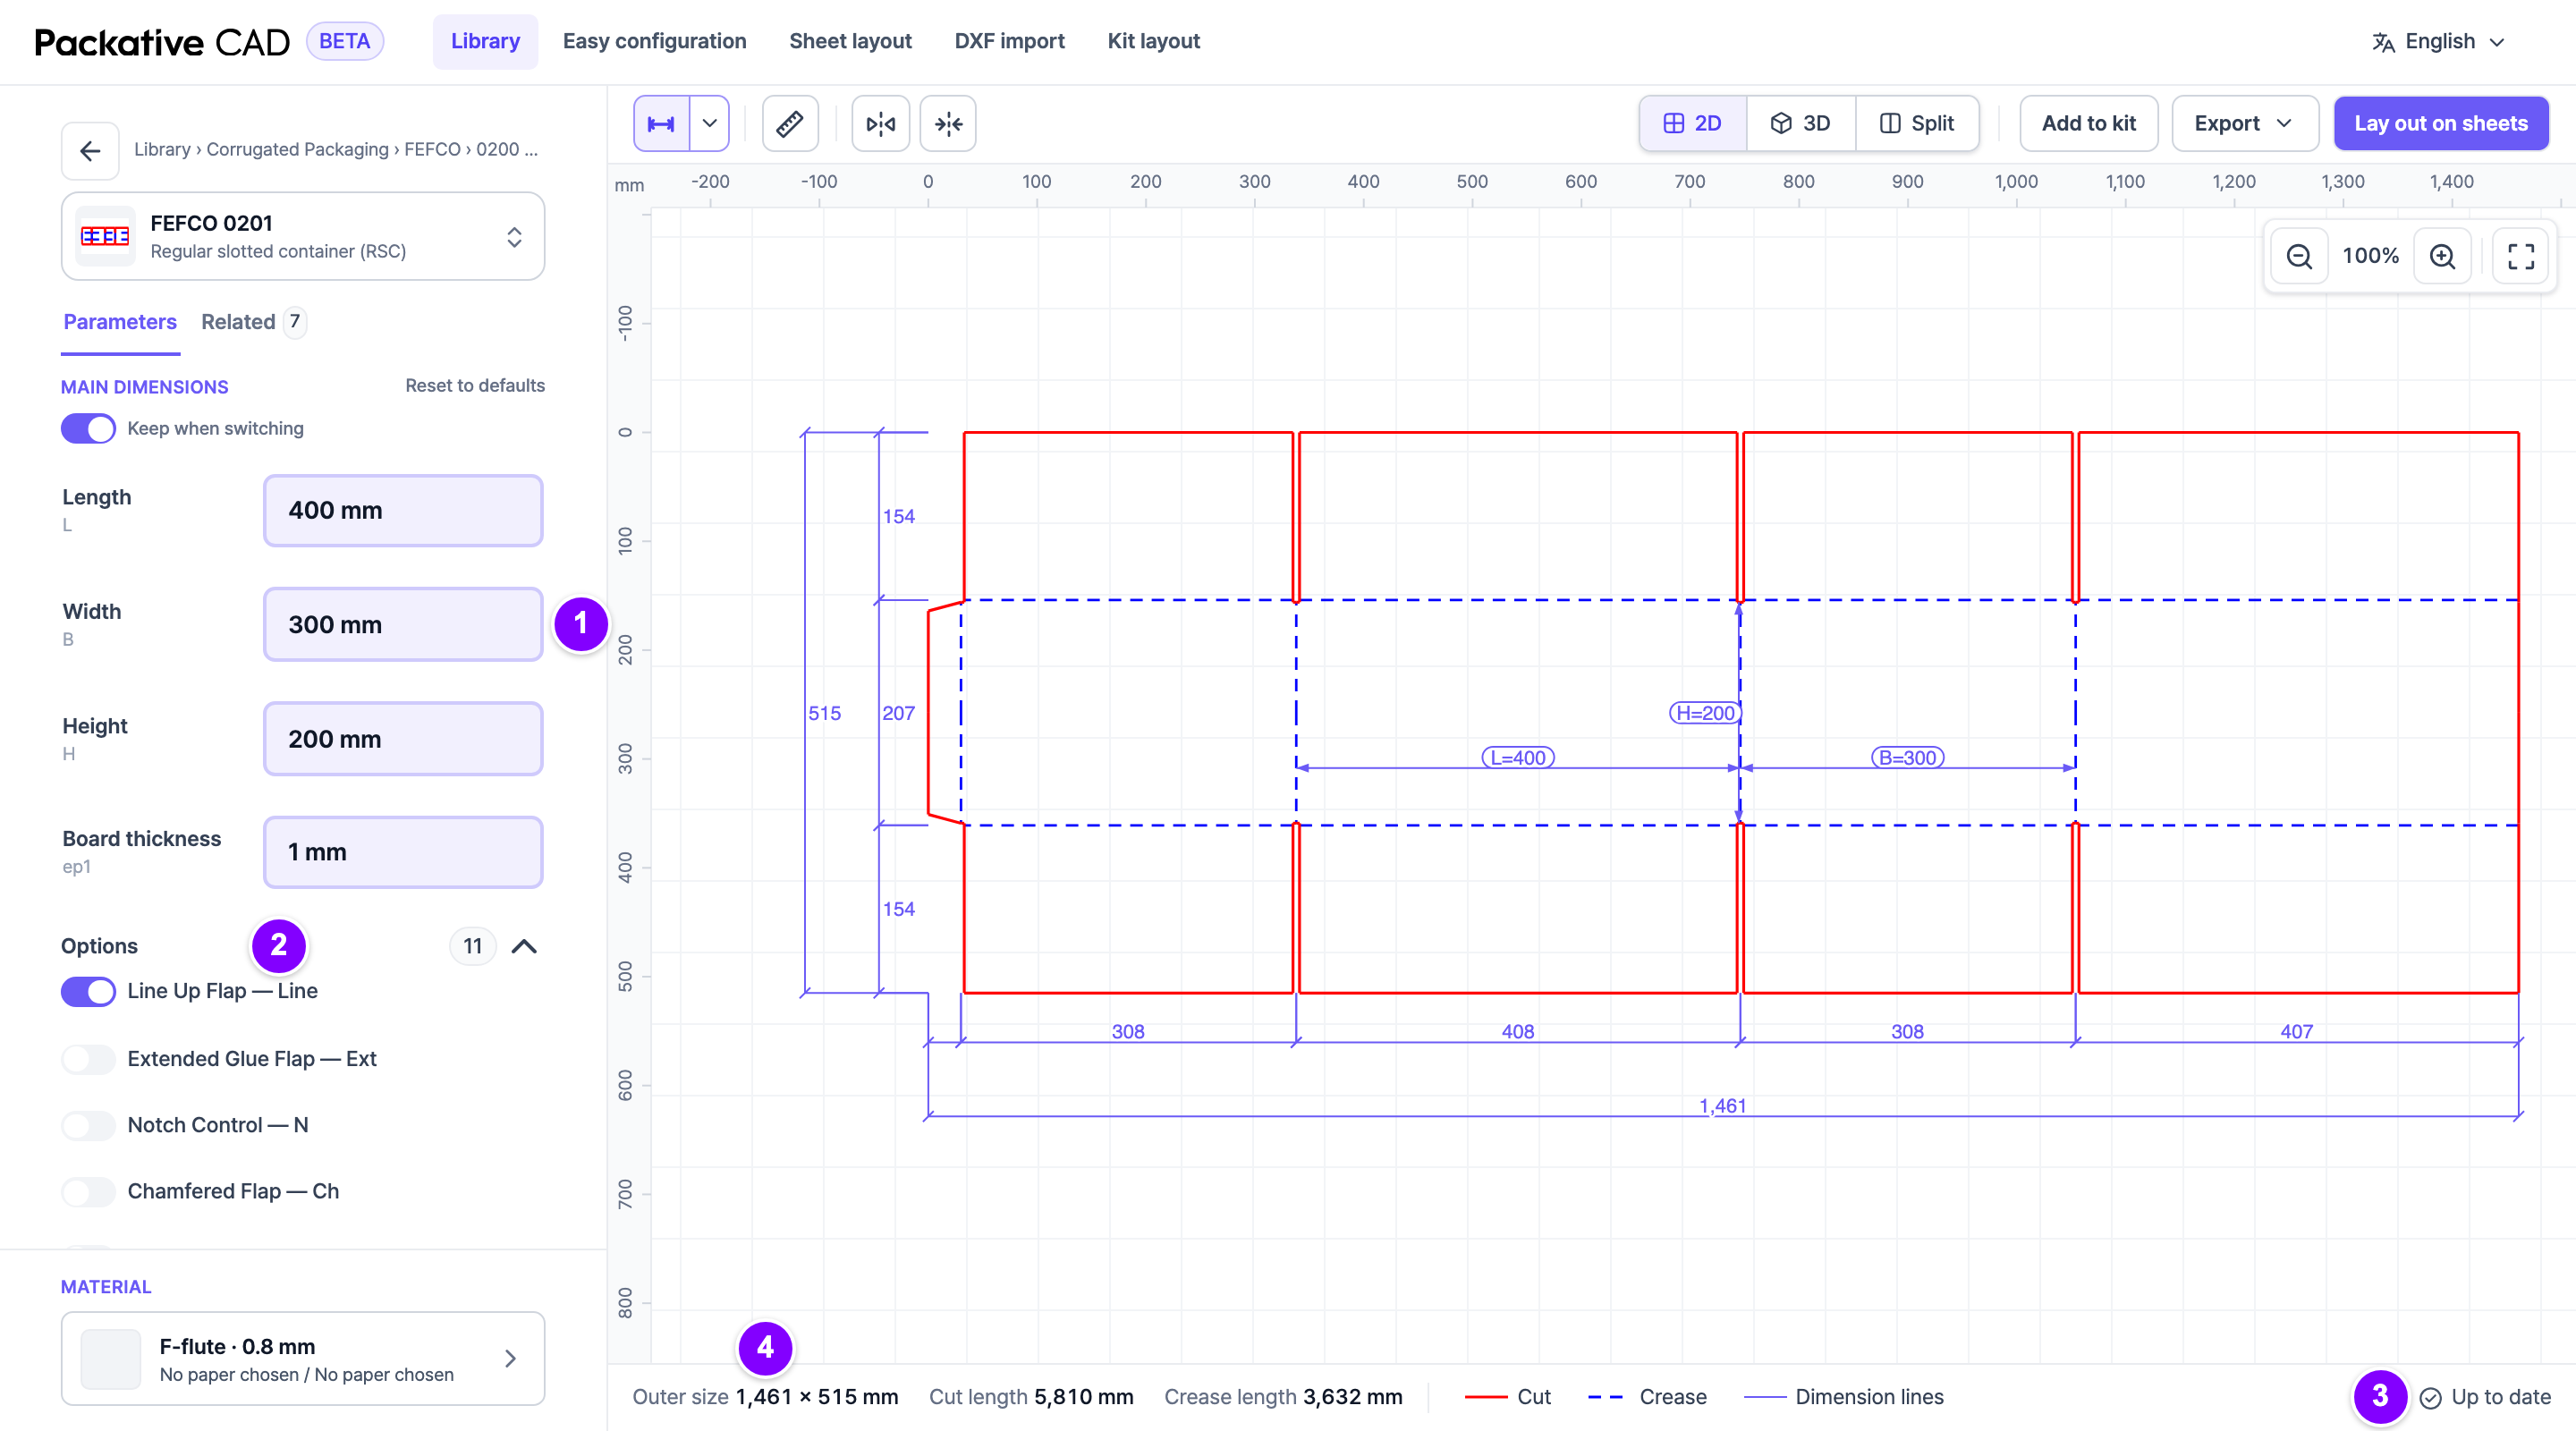
Set the Size
- 1 Under Main dimensions, type the Length, Width and Height, in mm. The small letters under the names (L, B, H) are the names used on the dieline. B is the width. Board thickness fills in from the flute, so leave it as it is.
- 2 Open Options to change things like the closure style or handholds.
- 3 Wait until the bottom right corner says Up to date.
- 4 Check the Outer size at the bottom left. This is the size of the flat box.
- Next, choose the board or paper.
Move on with Enter
After you type a size, Enter keeps it and moves to the next size; Shift+Enter goes back. In the last size, Enter keeps the value and stays there. Enter skips lists and switches; Tab works as before and reaches them too. While your keyboard is converting text (Japanese input), Enter only confirms the conversion.
Change a size on the dieline
Select a size on the dieline to change it in place. Enter keeps the new value, Esc cancels.
Inside or outside sizes?
Ask your printer or die maker whether your sizes are inside or outside sizes.
Good to Know
- Reset to defaults brings back the starting sizes. Undo brings yours back.
- A size that is too large or too small is held at the limit. A note tells you the limit.
- Dimensions shows or hides the sizes on the dieline. Its arrow offers Main dimensions or All dimensions. Your downloads follow this choice.
- Measure checks a distance or angle on the dieline.
- Flip horizontally and Flip vertically mirror the dieline.
- Some box styles have several pieces, such as a lid and a base. Use Pieces to see one piece at a time.
- The page address keeps all your choices. Share the link and the same box opens.
If Something Goes Wrong
A warning above the dieline
A warning tells you what to check, for example "n crease lines run past the cut outline." Check your sizes. You can still download the file.
If the screen says "This dieline could not be drawn with these values.", change a size or select Back to last working values. When a template does not allow a combination (for example a flute that cannot take the stopper), the message says why and what to change.